User guide
PayWay is a simple, secure, internet-based solution to collect and manage your customer payments. PayWay offers a wide range of payment channels, helping you to better manage your cash flow.
Introduction
PayWay Recurring Billing and Customer Vault
- Automatic payment collection from your customer's card, bank account or PayTo agreement
- Reporting available on failed payments, expiring credit cards and final payment due dates
- Automatic retry of failed payments
See PayWay Recurring Billing and Customer Vault for more.
PayWay Match
- Accept payments by direct credit or pay anyone
- PayWay matches every payment to the customer who paid
- You receive a single aggregate settlement to your bank account
- Customer number for each payment is included in a receipts file for upload into your accounting/ERP software
See PayWay Match for more.
PayWay Payment Cards
- PayWay Payment Cards are branded with your business's logo, displays payment instructions and ready to distribute to your customers
- Choose the payment options to suit your business including BPAY®, Direct Debit and Credit Cards
- Card ordering is through a simple online process
See PayWay Payment Cards for more.
PayWay Phone
- Uses Interactive Voice Response (IVR) technology to automatically accept credit card payments from your customers
- Voice prompts can be customised with your trading name
- PayWay hosted 1300 number, or your own 1300 number can be used
See PayWay Phone for more.
PayWay Net
- PayWay hosted website for collection of payments by credit card, PayPal® and PayTo
- Customised with your trading name and logo and to suit the existing layout of your invoice or statement
- Accepts your customer reference number for easy reconciliation
See PayWay Net and PayWay Net hand-off developers guide for more.
PayWay Virtual Terminal
- Process eCommerce / Telephone and Mail Orders
- Your call centre or sales employees can collect credit card payments using a web page, or a mobile optimised browser on a smartphone
- Multiple employees can access the system simultaneously
See PayWay Virtual Terminal for more.
PayWay Classic Credit Card API
- The Application Programmer Interface (API) allows you to integrate credit card transactions into your call centre system, website or any other application software that you manage
- Multiple merchants may be set up within the one facility
- Ability to use this module in conjunction with the Recurring Billing & Customer Vault to manage customers and their schedules
See PayWay Classic Credit Card API and PayWay Classic API Developers Guide for more on the legacy API.
PayWay Batch
- Accepts multiple credit card payments stored within your system by sending through a single file for processing
- Supports many standard file formats
- Single or dual file authorisation capability
See PayWay Batch for more.
PayWay Additional Transaction Reporting
- Enables you to consolidate the reporting of your PayWay, BPAY and Remittance Processing Service facilities to PayWay
See PayWay Additional Transaction Reporting for more.
Other PayWay Features
In addition, the PayWay website provides the following features for authorised users:-
- Search and View previous credit card and direct debit transactions,
- View Settlement Report that shows daily totals and detailed settlement reports
- View graphical Trend Reports of sales over the last 2 years,
- Set a surcharge percentage to be applied for credit card transactions,
- Set a flat rate surcharge amount to be applied for bank account direct debit transactions,
- View information about your Merchant Facility and Bank Account,
- Invite additional users from your company and control their access to PayWay.
- The PayWay REST API is automatically available to access the functionality of PayWay Net, PayWay Batch, PayWay Recurring Billing & Customer Vault, PayWay Connect and PayWay Match for no extra cost when you have that module active.
Setting up your facility
Your PayWay facility will be setup by your Implementation Manager. Your Implementation Manager will set up the following:-
- The PayWay Modules available in the Facility
- A Sign-In for the Administrator of your Facility
- Your Merchant Ids for processing Visa, MasterCard® and UnionPay transactions
- Your Bank Accounts for Settlement of Bank Account Debits, Direct Credit Payments, BPAY payments and PayTo Agreements.
- Billing for the use of your PayWay Facility
Once the nominated Administrator of your facility has been given access, they are responsible for:-
- Setting company contact details, and a company logo for use on transaction receipts, PayWay Net web pages, Payment Cards and Recurring Billing documents
- Creating invites for additional people to access the Facility
- Establishing and linking American Express®, JCB, Diners Club Merchants
- Set up a way to reconcile your bank accounts and record payments in your accounting system
Depending on the modules that you have selected to use, you may need to:-
- Develop, test and configure your Credit Card API
- Customise your PayWay Net payment pages and integrate your shopping cart
- Customise your PayWay Phone prompts
- Customise your PayWay Payment Card
- Set up Standard Plans for PayWay Recurring Billing and Customer Vault
- Setup any Custom Fields that you wish to use
Overview of menu and PayWay features
This is an overview of the features available in PayWay. Once you have logged into PayWay, use the menu at the top to access these features. For each page the help menu item in the top right, contains Help for this page.
Transactions
The Payment (only available when the Virtual Terminal module is selected) page allows you to type in credit card details and immediately receive a receipt for your payment.
The Search and Refund (Search if you do not have access to refunds) page allows you to find and view details of previous payments. You can refund payments to original cardholder or bank account up to the value of the original payment.
The Last 20 page shows a list of the last 20 transactions made.
The Open Pre-Auths (only available when the Virtual Terminal module is selected) page allows you to view credit card pre-authorisation transactions that can be captured (checked out).
The Suspended transaction page allows you to review transactions suspected to be fraudulent and proceed or cancel them.
The File Upload (only available when the Recurring Billing and Customer Vault or Batch module is selected) page allows you to upload a payment file to charge your customers.
Customers
(only available when the Recurring Billing and Customer Vault or Payment Cards module is selected)
The Add Customer page allows you to set up a new customer and set up a Recurring Billing arrangement, order a Payment Card or open a Virtual Account.
The Search and Edit page allows you to view and edit the details of an existing customer.
The Recently Viewed page shows a list of the recently viewed customers.
The Bulk Add/Edit page allows you to open a number of Virtual Accounts by uploading an Excel spreadsheet.
The Direct Debit Documents page allows you to download recurring billing documents, such as the Direct Debit Request and Service Agreement.
The Order Cards page allows you to order plastic wallet-sized cards for you to provide to your customers.
The Assign to Customer page allows you to record the name and contact details of your customer when you provide them with a card.
Recent Orders shows the card orders you have made.
Reports
The Receipt Files report shows details of receipts generated overnight. You can download any of these files.
The Daily Settlement report shows details of funds settled to your bank account. You can print a list of all the payments making up the total. You can download a file of all payments and refunds for a particular date. The file can be opened in Microsoft Excel.
The Weekly Settlement report shows details of funds settled to your bank account for the week.
The Monthly Settlement report shows details of funds settled to your bank account for a whole month.
The Yearly Settlement report shows details of funds settled to your bank account for a calendar or financial year.
The Customer reports allow you to list all customers or new customer in a particular month. The results can be exported.
The Virtual Accounts (only available when PayWay Match has been purchased) report lists all the virtual accounts you have opened.
The Recurring Billing (only available when Recurring Billing and Customer Vault module has been purchased) reports allow you to find customers that may need attention as they are about to make their final payment, are in arrears or have credit cards that will expire soon.
The Audit History page shows changes to your facility setup and changes to the users who can access these web pages.
The Trend Reports provides graphs of sales over the last eight weeks, and a month by month comparison of this year to last year.
Settings
The settings menu adjacent to the help menu with a cog and client number, contains all configurable settings for your PayWay facility.
PayWay modules
PayWay Recurring Billing and Customer Vault opens the pages to configure PayWay recurring billing accessible by the left menu. Use Standard Plans to save time when setting up many customers with the same payment amount and frequency. The Setup page allows you to set your preferences for Recurring Billing.
The PayWay Batch page allows you to configure the number of users needed to authorise a payment file upload.
Using the Application Programmer Interface (API) software developers can integrate credit card transactions into your call centre system, website or any other application software that you manage. The PayWay Classic API pages provide technical information, security options and downloads for Software Programmers.
PayWay Phone uses Interactive Voice Response (IVR) technology to automatically accept credit card payments from your customers. Use the PayWay Phone pages to configure and go live with PayWay
PayWay Net allows you to automatically accept card, PayPal® and PayTo payments from your customers using a PayWay hosted website, customised to collect your customer reference number and display your logo. It is designed to allow you to easily collect payments for invoices or statements that you send to your customers. Use the PayWay Net pages to configure and go live with PayWay Net.
PayWay Payment Cards opens pages used to configure PayWay payment cards. The left menu has the following items. Setup allows you to set up your branding and banking for Payment Cards. Use Go Live once everything is set up in order to enable this module.
The Fraud Guard page allows you to configure your fraud guard settings.
Add modules
The Add Modules pages PayWay Connect, PayWay Match and Fraud Guard show you how to enable these modules and once enabled the pages will display what to do next.
Reports
The Receipt Files page allows you to configure the file format for daily settlements.
Access to PayWay
The Users page allows you to give access to other employees and select the tasks they may perform.
The REST API Keys page shows details about your API keys and allows you to add publishable and secret keys. Additionally, you can delete active keys.
Banking
A Merchant Id is required in order to process Visa, MasterCard® and UnionPay credit card payments and refunds. The Merchants page allows you to view details of your Merchants. The page also allows you to set up your American Express® and Diners Club merchants if you wish to accept these types of cards.
A Bank Account is required in order to process direct debit and PayTo transactions. The Bank Accounts page allows you to view details of your linked Bank Accounts.
A PayPal account is required in order to process PayPal transactions via PayWay Net. The PayPal Accounts page allows you to link and unlink your PayPal accounts to PayWay.
PayWay facility
The Surcharges page allows you to set the surcharge rate for transactions made through the Recurring Billing and Customer Vault, Virtual Terminal, Phone and Net modules in PayWay.
The Company Details page allows you to set your company's contact details and logo. These are shown on receipts and other documents produced by PayWay.
The Custom Fields page lets you set up custom fields. Use custom fields to store additional information against your customers and payments.
Electronic Communication allows to configure how you will receive information from PayWay either by paper or electronically.
Manage personal data and security preferences
After signing in to your account, you can access your personal information using the Person icon dropdown menu next to the Sign out button.
The Profile page allows you to view your personal details and change your Time zone preferences.
Sign in
The Internet address (URL) for PayWay is:
- Westpac customers www.payway.com.au
- St. George customers payway.stgeorge.com.au.
Access to PayWay is provided by Accounts single sign on (SSO). The URL for Accounts is qvauth.westpac.com.au.
For more information see Accounts - User guide.
How do I get help if I can't sign in?
If you are having trouble signing in, or have forgotten your password, you can click the Having problems signing in? link at the bottom of the sign in screen.
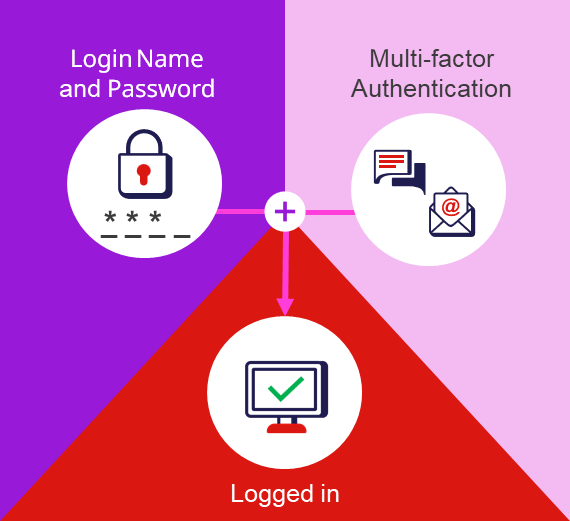
What is multi-factor authentication (MFA)?
Multi-factor authentication (MFA) is a security feature that requires multiple proofs of identity before a user account can be accessed. This means that when you sign in you will need to enter your Login Name and Password, and then also enter a verification code that is delivered to your email.
MFA is considered industry best practice. It helps secure user accounts against unauthorised access.
To manage your email refer to Manage personal data and security preferences.
Recurring Billing and Customer Vault
Before you can add customers for billing, you must complete your company details in the system. These details will appear in the Direct Debit Request and Service Agreement form that you will print and have signed by your customers.
Use the Customers menu item then Add Customer to start the Add Customer wizard. Enter the customer details, the payment schedule, and the account details for the customer. You can choose to either have PayWay create a regular series of payments automatically, or you can choose to upload a spreadsheet containing the amounts you wish to charge.
How to add regular customer?
- Click on Add Customer under Customers.
- Enter Customer Details and choose Regular Debit option from How this customer will pay. Click Next.
- Choose Payment Frequency, Payment Amount and Payment Method then click Next.
- Enter Bank Account details of client and Click Next.
- Confirm details are correct before clicking Save. Note: If you do not hold a signed Direct Debit Request (DDR) form for this customer. You can print the form by clicking on Print Direct Debit Request button and have it signed.
- Payment will be made for the first time if Date of First Payment is today and the details will be saved for the next payments.
- The following page will show the status of the payment and receipt no. for the first payment.
- You can add another customer by clicking on Add New Customer button.
When should I use a regular schedule of payments to charge my customers?
Use this option if you charge the customer on a regular basis, for example each month, and:
- You charge this customer the same amount each time
- You charge a special amount for the first payment, and then the same amount each time
- You charge a regular amount, with a different amount on the final payment
- You charge a special amount for the first payment, and then a regular amount, and then a different amount on the final payment
If you use this option you can still charge extra amounts using the file upload.
You can create a standard plan to save time when adding customers if you have many customers using the same payment frequency and amount.
How to add variable customer?
- Click on Add Customer under Customers.
- Enter Customer Details and choose Variable Debit option from How this customer will pay. Click on Next.
- Choose Payment Method and click Next.
- Enter Credit card Details and click Next.
- Confirm details are correct before clicking Save. Note: If you do not hold a signed Direct Debit Request (DDR) form for this customer. You can print the form by clicking on Print Direct Debit Request button and have it signed.
- The following page shows the customer details. You can edit details by clicking on Edit Customer button and you can add another customer by clicking on Add New Customer button.
When should I use a variable customer and file upload to charge my customers?
Use this option if:
- You wish to charge your customers a different amount each time, or you charge them on an irregular basis
- You are able to fill out a spreadsheet containing a list of customer numbers, and the amount you wish to charge
- You are able to search for each customer individually and enter the amount to be processed when it is due
Do not use this option if you wish to charge the same amount on a regular basis. In this case, you can set up a regular schedule of payments and have PayWay charge your customers on the due date.
When should I use the Application Programmer Interface (API) to charge my customers?
Use this option if:
- You wish to charge your customers a different amount each time, or you charge them on an irregular basis
- You wish to have programmatic control over when and how much your customers are charged
- You are able to write software to invoke the PayWay API with a customer number, and the amount you wish to charge
How does the Variable Recurring Billing and Customer Vault file upload work?
The recurring billing and customer vault upload file works as follows:-
- You add each of your customers, and their bank account or credit card details to the list held in PayWay
- You download a spreadsheet, which will contain a list of these customers
- You enter the date at the top of the spreadsheet
- You enter an amount next to each customer you wish to charge
- You upload the spreadsheet and authorise it
- PayWay will debit your customer's credit card or bank account on the due date.
If you prefer, you can upload a .CSV format file to charge your customers.
- Click on Upload a File under Transactions.
- Save
RecurruningBillingUpload.xlsspreadsheet on your desktop. - Open up
RecurringBillingUpload.xlsSpreadsheet and enter the payment amount that is due for each client under Amount and save the spreadsheet once done. - Click on File Upload under Transactions and upload the RecurringBillingUpload spreadsheet by clicking on Browse button.
- Next screen will show the status of the uploaded file.
- If Single Authorisation is enabled for Recurring Billing then user will need to authorise the file by clicking on the Authorise File button.
- Please note: If Dual Authorisation is enabled then 2 users will have to Authorise that file before the payment get processed.
- Please confirm that you want to authorise this file for processing before clicking Authorise File button.
- The following screen shows that upload file is being processed. Click on Refresh button to know how long it will take to upload this file.
- You can also void the file by clicking on Void File button.
What happens once I have added my customer?
Once you have entered the customer details, they are stored in the system and payments will be collected for that customer according to the regular schedule. If you have selected variable, then you must upload a file each time you wish to charge the customer.
The Recurring Billing reports page helps you locate customers that require your attention.
- You can find which customers have declined payments using the "Outstanding Failed Payments" report. You can easily change the customer's payment details and retry the payments from this report. Once the payment is successful, it will be automatically removed from this report.
- The "Customers with Final Payment Due" report shows you the customers that are nearing the end of their billing schedule. You should contact each customer to determine whether they wish to continue their billing arrangement with you. If so, you can edit the customer's Recurring Billing Setup to extend the number of payments remaining as required.
- The "Customers with Expiring Credit Cards" report shows customers who have credit cards that are due to expire. You should contact each customer to obtain their new credit card expiry date. Once you have this information, you should edit the customer's Recurring Billing Setup and enter the new expiry date.
What should I use for the customer number?
You should use whatever identifier your company uses internally for this customer (e.g. membership number, student number, policy number, licence number). Customer numbers can contain letter and numbers.
PayWay Match
PayWay Match allows you to accept direct credit or pay anyone payments from your customers. PayWay Match automatically matches every payment to the customer who paid and all payments are aggregated and paid into your underlying settlement account. PayWay Match includes the customer number for each payment in a receipts file which you can upload into your accounting/ERP software.
What is a Virtual Account?
A BSB and account number used to accept direct credit payments. Each of your customers uses a different virtual account. When a payment is sent to a virtual account, PayWay matches the payment to that customer. Your receipts file and settlement report includes the customer number for each payment. Your bank account receives a daily settlement for the total of all payments.
How do I open a Virtual Account?
Use the "Customers" menu item then "Add Customer" to start the Add Customer wizard. Enter the customer details and choose "PayWay Match Direct Credit". If you have more than one settlement account linked to your PayWay facility, you may then choose which one to use. Click "Save Customer and Open Account" to instantly open a new virtual account for the customer. You should then instruct the customer make direct credit / pay anyone payments to the virtual account. You can also open a virtual account for an existing customer by searching for the customer, and selecting the "Virtual Account" page.
How does my customer pay?
Your customer makes a payment to the BSB and account number you provide to them. T hey can do this using a direct credit or pay anyone facility offered by their bank.
How do I close a Virtual Account?
Click "Customers" menu item then "Search and Edit". Find the customer, and go to the "Virtual Account" page. Click "Close Virtual Account".
PayWay Phone
Click the settings menu item then "PayWay Phone" and follow the steps of the wizard to configure your phone payment preferences. Once your preferences have been entered, and PayWay has recorded your customised prompts, you can enable payments using the "Go Live" page.
Which parts of PayWay Phone are configurable?
Using the Setup Phone wizard you can configure:
- The prompt stating the trading name of your company, and brief description of what your customer is paying
- The prompt instructing your customer where to locate the customer reference number (e.g. customer number, invoice number) you would like them to enter so that you can determine who has paid
- The number of digits in your reference number
- The check digit (if any) included in your reference number
- The minimum and maximum amounts that your customers can pay
- The percentage surcharge you wish to charge
- The Merchant Id to use for phone payments (if you have more than one)
What do I need to print on my invoice or statement?
Your invoice or statement will need:
- The PayWay phone number (1300 885 175), and a statement that credit card payments can be made by phone,
- Your PayWay Biller Code, which is the same on all your invoices,
- A customer reference number (e.g. Invoice number, policy number)
What can I use as my customer reference number?
You can use any number that you are already printing on your invoices or statements, provided it is less than 20 digits in length. Letters cannot be used as they cannot be entered using a telephone keypad using IVR technology. Typically, your invoice or statement will already have a customer number, invoice number or policy number printed on it. Use this number.
When you search for payments using the PayWay website, the customer reference number entered by your customer will appear in the "Customer Reference Number" field. When you click "Export Payments" from the Settlement Report, the customer reference number will be shown in the "CustomerReferenceNumber" column. This allows you to determine who has paid.
How long does it take to record my customised phone prompts?
Phone Prompts are recorded once a month. You must request your phone prompts using the Setup Phone pages by 6pm Sydney time on the 20th of the month in order to be included in the monthly recording session. The phone prompts will then be available before the first of the new month.
How to set up PayWay Phone
- Click on Setup under Setup Phone.
- The following screen displays the 1300 phone number that your customers will dial in to make payment. Click on Next.
- You must print your PayWay Biller Code on your Invoice or Statement as displayed on the following screen.
- Customise the message for your customer to locate their Customer Number/Reference Number on the invoice.
- You may also customise Minimum and Maximum digits for Reference number to avoid data entry error from your customer's side.
- Click on Next.
- You may customise the minimum and maximum amount and card type surcharges for phone payments. Click Next.
- Click Next.
- Step 6 displays the Phone script summary. Click Next.
- Click on the both tick boxes and click on Request Prompt Recording button.
- Make sure you understand the Prompt Agreement before clicking Next.
- Go live page will display action items that are due on either you or your implementation manager. Phone facility can not go live unless you and your Implementation manager complete these tasks.
- Once these action items are completed then your PayWay Phone facility can go live that means your customers will be able to make phone payments.
PayWay Net
Click the settings menu item then "PayWay Net" and follow the steps of the wizard to configure your net payment preferences. Once your preferences and your company details have been entered you can enable net payments using the "Go Live" page.
Which parts of PayWay Net are configurable?
Using the Setup Net wizard you can configure:
- The customer reference number label
- The help text instructing your customer where to locate the customer reference number you would like them to enter
- The number of digits in your reference number
- The check digit (if any) included in your reference number
- The minimum and maximum amounts that your customers can pay
- The percentage surcharge you wish to charge
- The Merchant Id to use for net payments (if you have more than one)
PayWay Net will also display the trading name of your business, contact details, your ABN and your company logo. These details can be modified on the "Company Details" page.
What do I need to print on my invoice or statement?
Your invoice or statement will need:
- The PayWay website www.payway.com.au (for Westpac customers) or payway.stgeorge.com.au (for St. George customers) and a statement that credit card payments can be made online
- Your PayWay Biller Code, which is the same on all your invoices
- A customer reference number (e.g. Invoice number, policy number)
What can I use as my customer reference number?
You can use any number that you are already printing on your invoices or statements, provided it is less than 20 digits in length. For compatibility with PayWay Phone, we do not recommend using letters in your customer reference number. Typically, your invoice or statement will already have a customer number, invoice number or policy number printed on it. Use this number.
Can I put a link from my website to the PayWay website?
Yes, you can create a simple link on your website as follows:
St. George customers
https://payway.stgeorge.com.au/net/NetTransactionEditView?BillerCode=XXXXXX
where
XXXXXX is your 6-digit PayWay Biller Code as shown in the Setup Net wizard.
Westpac customers
https://www.payway.com.au/net/NetTransactionEditView?BillerCode=XXXXXX
where
XXXXXX is your 6-digit PayWay Biller Code as shown in the Setup Net wizard.
This link will not work until you "Go Live" using the Setup Net pages.
PayWay Payment Cards
Click the settings menu item then "PayWay Payment Cards" and follow the steps of the wizard to configure your preferences. Once your preferences and your company details have been entered you can enable payments using the "Go Live" page.
Which parts of the PayWay Cards Module are configurable?
Using the company details page and the setup wizard you can configure:-
- The logo printed on the front of the Payment Card
- The customised message printed on the back of the Payment Card
- The percentage surcharge you wish to charge for credit card payments
- The surcharge dollar amount you wish to charge for bank account direct debit payments
- The Merchant Id to use for phone payments (if you have more than one)
- The Bank Account to use for recurring billing and BPAY (if you have more than one bank account loaded into your PayWay facility)
- The voice prompt stating the trading name of your company, and brief description of what your customer is paying
You will then be ready to order payment cards and distribute them to your customers. You can order cards in a number of different ways, to suit your business.
It is recommended that you order a single sample card before performing a bulk order.
Why would I pre-order stock?
The advantage of pre-ordering stock is that you can have it on hand to provide to your customers rather than waiting for PayWay to print and mail new cards to you.
When you pre-order stock a number of payment cards will be mailed to you for a series of customer numbers. For example, you can pre-order stock for customer numbers 1 to 100. When you win new customers and provide them with a card you must record the customer number so you will know who has paid. You can do this using the Assign to Customer page in PayWay or in your own accounting system.
Why would I order a card for a single customer?
If you order cards for a single customer, PayWay can print the customer name on the front of the payment card. Also, if you have some customers that have agreed to a Recurring Billing arrangement you need not buy them a payment card - saving you money.
Why would I use a spreadsheet upload?
You may wish to use a spreadsheet upload instead of the Single Customer option if you have a large number of customer orders to place and it is easier to cut and paste into the spreadsheet than to enter the details individually through the PayWay website.
Alternatively, you may wish to use a spreadsheet upload instead of Pre-order Stock if your customer numbers are not generated in a simple numeric sequence (101, 102, 103, etc.). This may happen if your customer number contains a check-digit, letters or special characters.
How to set up and order Payment Cards?
- Click on Setup under Payment Cards. Either choose default message or customise your own message. This message will be displayed on the back of the Payment Card. Click Next.
- Customise the surcharges rates and your customised phone prompt then click Next.
- Click on both check boxes under Fee description and Click "Request Prompt Recording".
- Make sure you understand the Phone Prompt Agreement before clicking Next.
- Click on Go Live button.
- Click on Order Cards button.
- Choose the type of order you would like to place and click Next.
- Enter details of the customer for whom you want to order the Payment Card. Please Note: Customer Initiated option is pre populated.
- Choose appropriate Payment Card option. Click Next.
- Make sure customer details are correct before clicking on Confirm Order button.
- You can add new customer by clicking on Add New Customer button.
Credit card payment and refund processing
PayWay provides several mechanisms for processing credit card transactions.
- Using the PayWay Cards Application Programmer Interface (API), software developers can integrate credit card transactions into your call centre system, website or any other application software that you manage. Refer to the "PayWay API Developer's Guide" for technical information on setting up the credit card API. This is available from the "Download" page under the "Setup API" option on the PayWay website.
- The Payment page allows you to type in credit card details and immediately receive a receipt for your payment. This can be used for Mail Order or Telephone Order transactions.
- The Recurring Billing and Customer Vault module allows you to set up a series of automatic payments from your customers, or to record a customer number and associated credit card details. You can then charge your customer by providing the customer number and the amount to charge.
- The PayWay Phone and PayWay Net modules allow you to automatically collect payments from your customers 24 hours a day.
Why was my transaction declined?
Refer to the online help by clicking the help icon in the top left corner for information about declined transactions.
How can I refund a transaction that was not originally processed through PayWay?
Only transactions that were originally processed through PayWay can be refunded using this system. Use the original processing system to refund the transaction.
Do charge-backs appear in the system?
No. Charge-backs for your merchant will still be received through the normal mechanism (usually fax) .
How to Refund a credit card transaction?
- Click on Search and Refund under Transactions and search for the credit card transaction that you want to refund.
- Choose the transaction from the list that you want to refund.
- Click on Refund button.
- You can change the refund amount if you want to refund the lower amount.
- Click on confirm Refund button.
- You can also email the receipt to the card holder by adding email address in "Send receipt email to" text box and Click Next.
Direct debit payment and refund processing
Currently, PayWay provides only one mechanism for processing direct debit transactions.
The Recurring Billing and Customer Vault module allows you to set up automatic payments from your customers.
Note that there is a 3-day clearing period for direct debit transactions. This means that transactions may be declined by your customer's bank for three banking days after they were processed. If a transaction is declined, its status will change from "Approved" to "Declined".
Why was my transaction declined?
Refer to the description in the transaction status for information about why a particular transaction declined.
How can I refund a transaction that was not originally processed through PayWay?
Only transactions that were originally processed through PayWay can be refunded using this system. Use the original processing system to refund the transaction.
Direct credit payment and refund processing
Direct credit payments may be refunded up until 6pm Sydney time on the banking day after the payment was sent by the customer. It is generally not necessary to refund a direct credit payment because your customer has sent the payment to you.
PayTo payment and refund processing
PayTo payments are real-time, and may be refunded at any time during the day.
Settlement and reconciliation
PayWay allows you to view the daily settlement report for all approved payments and refunds. For credit card transactions, it shows for each merchant the value of transactions approved for Visa/MasterCard®/UnionPay and for American Express® and Diners Club if you have registered those card schemes. For direct debit transactions, it shows the total disbursements and returns for each of your bank accounts.
To access the Settlement Report, click on the "Reports" menu item then "Daily Settlement".
What is the settlement date?
The settlement date represents the date that the transaction will be settled by the acquiring bank. The settlement date cut-off is always 6pm Sydney Time. If you process transactions after this time, the settlement date will be the following day. For example, if you process a transaction at 7pm on 24 Jan 2014, the settlement date will be 25 Jan 2014.
How are credit card transactions settled?
Different settlement rules apply for credit card transactions depending on which financial institution is the acquirer. Each acquirer will provide one settlement for each settlement date. The group of card schemes that an acquirer will settle is referred to as a credit group. The relationship between card scheme, credit group and acquirer is shown in the table below.
| Card Scheme | Credit Group | Acquirer | Surcharges Can be Settled Separately |
|---|---|---|---|
AMEX |
AMEX |
Amercian Express® | No |
DINERS |
DINERS |
Diners Club | No |
JCB |
AMEX |
Amercian Express® | No |
MASTERCARD |
VI/BC/MC |
Westpac/St. George | Yes |
VISA |
VI/BC/MC |
Westpac/St. George | Yes |
UNIONPAY |
VI/BC/MC |
Westpac/St. George | Yes |
Westpac/St. George credits your account the same day, except on weekends and national public holidays when the settlement is delayed until the next banking day. The amount credited is the total of approved transactions. Any direct debit or merchant service fees will be deducted as separate transactions per your service agreement.
If your PayWay facility is set up to credit surcharges separately, you will receive one credit representing all the principal amounts and a second credit for all the surcharge amounts. This is only available on Visa, MasterCard® and UnionPay transactions.
American Express® and Diners Club may credit your account a number of days later and may be a net amount (ie approved transactions less the merchant service fees), depending on your contract with them. Although Westpac/St. George facilitates the processing of the transaction, we do not control settlement for these schemes and therefore any queries should be made to American Express® and Diners Club directly.
For reconciliation purposes, all successful transactions through a given acquirer that return the same settlement date will be credited together on the same day.
How are direct debit transactions settled?
Direct debit transactions work differently from credit card transactions in that there is no immediate response from your customer's bank to indicate whether the transaction worked. Instead, the transaction is assumed to have worked unless it is later declined by the customer's bank. The customer's bank can decline the transaction for up to 3 banking days after the transaction was processed. If a transaction is declined in this fashion, the funds will be removed from your account when the transaction is declined.
Your account will be credited with the total amount of all direct debit transactions processed in one settlement day. Your account may also be debited with the amount of declined (or "returned") direct debit transactions. You will receive one debit for each returned transaction. If no transactions are returned, you will not receive a debit that day.
How are direct credit and pay anyone transactions settled?
All direct credit and pay anyone transactions will be credited in bulk to your nominated bank account on the following banking day.
How are PayTo transactions settled?
All PayTo transactions will be individually credited to your nominated bank account on the same banking day.
How are BPAY transactions settled?
All BPAY transactions will be credited in bulk to your nominated bank account each banking day. This is a separate transaction to any direct debit and credit card transactions. Unlike direct debit and credit card payments, you are not notified of attempts to pay where your customer had insufficient funds and these do not appear in reports.
Which individual payments and refunds make up the settlement total amount?
You can download a full list of approved transactions as follows:-
- Click on Reports menu item then Daily Settlement
- Enter the Settlement Date
- Click Display
- Click Export Payments or Print Payments
The exported transactions can be viewed in Microsoft Excel. You can also download or print an entire month of transactions using the Monthly Settlement page.
Can I download files in the RECall format?
You may wish to receive files in the RECall format as various accounting systems can accept this file format.
To enable RECall files:
- Click on settings menu item then under Reports click "Receipt Files"
- Select the option "Recall File Format through web interface" and click "Save"
- If your accounting software expects files to be named "erpYYYY.DDD" then select the "DeskBank naming standard" option.
- Click Save
RECall files are generated overnight. You will still be able to access the CSV and Print reports.
American Express® and Diners Club
PayWay allows you to accept payments from American Express® and Diners Club cards if you register an Amex or Diners facility with the relevant charge card company.
How do I register an Amex or Diners facility?
To accept charge cards such as Amex or Diners through PayWay, you must first arrange a merchant facility directly with the charge card company. This cannot be arranged via PayWay.
You will receive a 10-digit merchant ID from Amex or Diners. If you have multiple merchant IDs in PayWay, you will require a separate Amex or Diners facility for each merchant ID.
Once you have established an American Express® or Diners facility, you need to:
- Click Register to accept Amex or Diners through PayWay which is available by clicking settings menu item then under "Banking" click "Merchants"
- Enter the 10 digit American Express® or Diners merchant ID and click Continue.
- Tick all the boxes if you accept the registration pre-requisites and click Submit.
We will contact American Express® /Diners on your behalf to link the merchant facilities. You will then get an email confirming your registration and within 5 business days you will receive another email to confirm when you can start processing American Express® or Diners card transactions.
Note: Although PayWay provides a channel for accepting Amex and Diners transactions, any settlement or merchant service fee related questions for Amex/Diners transactions should be directed to the charge card company and not PayWay or the bank.
Trend reports
PayWay allows you to download a report of sales made over the previous 2 years. This report can be downloaded in PDF or CSV format. Transactions are based on the settlement date.
The Trend Report will allow you to make comparisons of trends in sales from month to month or year to year. It contains data about the total value of sales, the number of sales made and average value of sales.
For clients with more than one merchant, data for each merchant will be separated out into different reports, though will be contained within the same file. To access Trend Reports, click on the "Trend Report" option under "View" on the PayWay website.
When can I download a Trend Report containing information about today's sales?
The Trend Report for the current day will be available to download at 6 a.m. next day.
How can I find out a specific value on a graph?
For peaks within a graph the value is displayed. If the value required is not displayed on the graph, the CSV files provide a detailed summary of the data displayed in the PDF file. They can be used to look up what specific values are on the graphs. They can also be opened in Microsoft Excel where additional graphs can be generated and tailored to your own requirements.
User setup
PayWay allows you to give access to other employees and select the tasks they may perform.
To access this feature, click the "Users" option. This page shows all users in your company. From this page you can invite a new user, view details of existing users and edit or disable their access. When inviting a new user, you will need to select roles for the user.
What do the roles mean?
Transactions
- Make Manual Payments - the user can process transactions but cannot search or refund transactions.
- View Payments and Refunds - the user can view all transactions but is not able to process or refund transactions.
- Refund Transactions - the user can view all transactions and refund transactions. Refunds can only be made back to the credit card or bank account and to the value of the original payment.
- Authorise Uploaded Files - the user can authorise transaction files uploaded for variable recurring billing.
Customers
- Manage Customers - the user can add, view and modify customers set up for recurring billing. The user can open or close virtual accounts used for PayWay Match. The user can order PayWay Payment Cards.
Recurring Billing
- Manage Standard Plans - the user can add, view and modify standard plans, which are recurring payment schedules that apply to more than one customer.
Reports
- View Settlement Reports - the user can view daily settlement reports, trend reports and audited actions performed by users in your company.
Setup
- Setup API - this role is for use by software developers. The user can download an API Client, modify security settings, and download a certificate.
- Setup Phone and Net - the user can modify settings for Phone and/or Net services.
- Setup Payment Cards - the user can set the preferences for payment cards (including surcharges, marketing messages).
Administration
- Client Administrator - the user can view the details of merchants and register for Amex and Diners facilities, purchase new modules online
- Administer Users - the user can invite new users, edit details of existing users, and disable a user's access.
How do I delete or disable an existing user?
- Edit the user and click on the Disable button.
- Enter your own password for security confirmation and press Save.
Support
See Technical Support.
Internet Sign Up for Recurring Billing
If you use the PayWay Recurring Billing and Customer Vault module, you can allow your customers to register themselves via the internet. There are three ways to do this:-
- Variable Debit. The customer follows a link from your website and enters their bank account/credit card details into PayWay. You upload a file of transactions containing the customer number, amount and date when payment is due. Alternatively, you develop software to invoke the PayWay API when payment is due.
- Regular Debit - Standard Plan. The customer follows a link from your website and enters their bank account/credit card details into PayWay. The link includes the name of a Standard Plan. PayWay automatically takes payments on each due date.
- Regular Debit - Customer Chooses Schedule. The customer follows a link from your website and enters their bank account/credit card details into PayWay. The customer chooses the payment amount, frequency, and number of payments. PayWay automatically takes payments on each due date.
Each of these options is discussed below.
Variable debits
To set up this option:
- Sign in to PayWay
- Click on settings menu then under "PayWay Modules" click "PayWay Recurring Billing and Customer Vault"
- Click "Internet Sign Up" in the left menu
- Click "Details..." under "Customer Sign Up with Variable Schedule of Payments"
- Click the "Enable" radio button
- PayWay will display a HTML link. Copy this HTML link into your website.
- Click "Save"
This link takes the customer to the start of the internet sign up wizard, where they must enter their contact and payment information. Your company contact details and logo will appear in this wizard. Your company contact details and logo can be set by clicking on settings menu then under " PayWay Facility" click "Company Details". This option is only available to administrators.
This link has the base URL below, and contains the parameters in the following table.
St. George customers
https://payway.stgeorge.com.au/SignUp
Westpac customers
https://www.payway.com.au/SignUp
| Parameter Name | Optional | Example | Description |
|---|---|---|---|
ClientNumber |
No | Q100000 |
Your PayWay client number. This is shown in the top right corner of the PayWay web site once you have logged in. |
Frequency |
No | VARIABLE |
This parameter must be passed as VARIABLE. |
AddressRequired |
Yes | true, false |
Whether the customer is required to enter their full contact information or not. |
CustomerNumber |
Yes | 2442524G |
Your unique reference for this customer. If empty, this will default to a system generated number. |
CustomerName |
Yes | Joe+Smith |
The name of the customer. If present, the customer cannot override it. If empty, the customer must enter their own name in the sign up process. |
Note: Parameters appear in the URL after a question mark symbol (?) and multiple parameters are separated by an ampersand symbol (&). If a parameter value contains spaces, replace the spaces with the plus symbol (+) when adding the value to the URL.
For example - Westpac customers
https://www.payway.com.au/SignUp?ClientNumber=Q10000&Frequency=VARIABLE&AddressRequired=true&CustomerNumber=5245245&CustomerName=Joe+SmithFor example - St. George customers
https://payway.stgeorge.com.au/SignUp?ClientNumber=Q10000&Frequency=VARIABLE&AddressRequired=true&CustomerNumber=5245245&CustomerName=Joe+SmithWe recommend that you open this link in a new browser window using the following HTML code:
<a target="_blank" href="...">Sign Up Now</a>You should also display text similar to the following underneath the link so that your customers know they will be taken to another website for the sign-up process.
"This link will take you to our sign up page hosted by Westpac/St. George. You do not have to be a Westpac/St. George customer to use this page."
The New Customers report shows details of customers that have signed up on the Internet. You can access this report by clicking on Recurring Billing under View Reports. The list of new customers may be exported to a CSV file for upload into your back-end systems.
In order to charge your customer's registered details, you must either:-
- Upload a transaction spreadsheet listing the customer numbers, amounts and date due,
- Edit the customer and switch them to a regular recurring billing schedule,
- Invoke the PayWay Application Programmer Interface (API) from your software and provide the customer number and amount. (This option is only available with the Recurring Billing and Customer Vault or PayWay API modules.)
Regular debits - Standard Plan
To set up this option:
- Sign in to PayWay
- Click on settings menu then under "PayWay Modules" click "PayWay Recurring Billing and Customer Vault",
- Click on "Standard Plans" in the left menu,
- Click the "Add New Plan" button and follow the wizard,
- Tick the "Allow customers to sign up on this plan on the internet" checkbox,
- At the conclusion of the Add Standard Plan wizard PayWay will display a HTML link. Copy this HTML link into your website.
This link takes the customer to the start of the internet sign up wizard, where they must enter their contact and payment information. Your company contact details and logo will appear in this wizard. Your company contact details and logo can be set by clicking on settings menu then under " PayWay Facility" click "Company Details". This option is only available to administrators.
This link has the base URL below, and contains the parameters in the following table.
St. George customers
https://payway.stgeorge.com.au/SignUp
Westpac customers
https://www.payway.com.au/SignUp
| Parameter Name | Optional | Example | Description |
|---|---|---|---|
ClientNumber |
No | Q100000 |
Your PayWay client number. This is shown in the top right corner of the PayWay web site once you have logged in. |
PlanName |
Yes | Monthly+Gym+Membership |
The name of the plan that the customer will sign up to. If empty, the customer will select a standard plan from a list. |
AddressRequired |
Yes | true, false |
Whether the customer is required to enter their full contact information or not. |
FirstPaymentDate |
Yes | 18+Sep+2006 |
The date of the first payment for this customer. If empty, this will default to the current date. Also, if the date specified is more than one month in the future or one month in the past, the current date will be used. |
CustomerNumber |
Yes | 2442524G |
Your unique reference for this customer. If empty, this will default to a system generated number. |
CustomerName |
Yes | Joe+Smith |
The name of the customer. If present, the customer cannot override it. If empty, the customer must enter their own name in the sign up process. |
Note: Parameters appear in the URL after a question mark symbol (?) and multiple parameters are separated by an ampersand symbol (&). If a parameter value contains spaces, replace the spaces with the plus symbol (`+``) when adding the value to the URL.
For example - Westpac customers
https://www.payway.com.au/SignUp?ClientNumber=Q10000&PlanName=Monthly+Gym+Membership&AddressRequired=true&FirstPaymentDate=21+Sep+2006&CustomerNumber=5245245&CustomerName=Joe+SmithFor example - St. George customers
https://payway.stgeorge.com.au/SignUp?ClientNumber=Q10000&PlanName=Monthly+Gym+Membership&AddressRequired=true&FirstPaymentDate=21+Sep+2006&CustomerNumber=5245245&CustomerName=Joe+SmithWe recommend that you open this link in a new browser window using the following HTML code:
<a target="_blank" href="...">Sign Up Now</a>You should also display text similar to the following underneath the link so that your customers know they will be taken to another website for the sign-up process.
"This link will take you to our sign up page hosted by Westpac/St. George. You do not have to be a Westpac/St. George customer to use this page."
The New Customers report shows details of customers that have signed up on the Internet. You can access this report by clicking on Recurring Billing under View Reports. The list of new customers may be exported to a CSV file for upload into your back-end systems.
PayWay will automatically charge the customer based on the schedule entered as part of the standard plan.
Regular debits - Customer chooses schedule
To set up this option:
- Sign in to PayWay
- Click on settings menu then under "PayWay Modules" click "PayWay Recurring Billing and Customer Vault",
- Click on "Internet Sign Up" in the left menu,
- Click "Details..." under "Customer Sign Up with Regular Schedule of Payments"
- Click the "Enable" radio button
- PayWay will display a HTML link. Copy this HTML link into your website.
- Click "Save"
This link takes the customer to the start of the internet sign up wizard, where they must enter their contact and payment information. Your company contact details and logo will appear in this wizard. Your company contact details and logo can be set by clicking on settings menu then under " PayWay Facility" click "Company Details". This option is only available to administrators.
This link has the base URL below, and contains the parameters in the following table.
St. George customers
https://payway.stgeorge.com.au/RegularSignUp
Westpac customers
https://www.payway.com.au/RegularSignUp
| Parameter Name | Optional | Example | Description |
|---|---|---|---|
ClientNumber |
No | Q100000 |
Your PayWay client number. This is shown in the top right corner of the PayWay web site once you have logged in. |
Frequency |
No | VARIABLE |
This parameter must be passed as VARIABLE. |
AddressRequired |
Yes | true, false |
Whether the customer is required to enter their full contact information or not. |
CustomerNumber |
Yes | 2442524G |
Your unique reference for this customer. If empty, this will default to a system generated number. |
CustomerName |
Yes | Joe+Smith |
The name of the customer. If present, the customer cannot override it. If empty, the customer must enter their own name in the sign up process. |
Note: Parameters appear in the URL after a question mark symbol (?) and multiple parameters are separated by an ampersand symbol (&). If a parameter value contains spaces, replace the spaces with the plus symbol (+) when adding the value to the URL.
For example - Westpac customers
https://www.payway.com.au/RegularSignUp?ClientNumber=Q10000&AddressRequired=true& CustomerNumber=5245245&CustomerName=Joe+Smith``For example - St. George customers
https://payway.stgeorge.com.au/RegularSignUp?ClientNumber=Q10000&AddressRequired=true& CustomerNumber=5245245&CustomerName=Joe+Smith``We recommend that you open this link in a new browser window using the following HTML code:
<a target="_blank" href="...">Sign Up Now</a>You should also display text similar to the following underneath the link so that your customers know they will be taken to another website for the sign-up process.
"This link will take you to our sign up page hosted by Westpac/St. George. You do not have to be a Westpac/St. George customer to use this page."
The New Customers report shows details of customers that have signed up on the Internet. You can access this report by clicking on Recurring Billing under View Reports. The list of new customers may be exported to a CSV file for upload into your back-end systems.
PayWay will automatically charge the customer based on the schedule entered as part of the sign-up process.
Transaction Export CSV file format
RECall file format
To enable RECall files:
- Click on settings menu then under "Reports" click on "Receipts Files"
- Select the option "Recall File Format through web interface" and click "Save"
- If your accounting software expects files to be named "erpYYYY.DDD" then select the "DeskBank naming standard" option.
- Click Save.
See RECall File Format.
Recurring Billing Export file format
See Recurring Billing Export File Format.
Recurring Billing and Customer Vault variable customers file upload
See Recurring Billing and Customer Vault Variable Customers File Upload .
Credit card and direct debit status codes
- See Credit card status codes.
- See Direct debit status codes.
- See PayTo status codes.